Setting up a 2-Bay NAS should make your life easier, but many small businesses get it wrong. Poor configuration leads to slow file transfers, streaming issues, and even data loss that can hurt your business.
A 2-Bay NAS system is perfect for storing and sharing media files like videos, photos, and documents across your team. But simple setup mistakes can create big problems down the road. This guide shows you the five most common errors people make when setting up their 2-Bay NAS and how to avoid them.
Whether you’re storing client work, marketing materials, or company files, getting your NAS setup right from the start will save you headaches and protect your valuable data.
Selecting and Configuring Your 2-Bay NAS Hardware
Proper hardware selection and configuration forms the foundation of a reliable NAS system. When choosing drives, avoid the common pitfall of selecting SMR (Shingled Magnetic Recording) drives, which can severely impact write performance during media transfers. Instead, opt for CMR (Conventional Magnetic Recording) drives specifically rated for NAS operations. For optimal performance, calculate your storage requirements carefully, accounting for both current needs and projected growth over the next 24 months.
RAID Configuration Best Practices
When setting up RAID, carefully evaluate your specific needs. RAID 1 offers full redundancy by mirroring data across both drives, ideal for critical business media that cannot afford downtime. While RAID 0 provides maximum storage capacity and faster speeds, the lack of redundancy makes it suitable only for easily replaceable media files. Before finalizing your RAID configuration, use a raid calculator to run a complete simulation of drive failure scenarios to verify rebuild procedures work as expected. Factor in rebuild times, which can take 12-24 hours for typical configurations.
Drive Selection Errors to Avoid
Never mix drive capacities or speeds in your NAS, as this leads to inefficient storage utilization and potential performance bottlenecks. Ensure both drives are from the same product family and firmware version to prevent compatibility issues. Schedule regular firmware updates during off-peak hours to maintain optimal performance and security. Monitor drive temperatures regularly, maintaining adequate airflow around the NAS unit, and consider installing the system in a well-ventilated area away from direct sunlight or heat sources.
Optimizing Network for Fast Connection Speeds
Router Configuration Step-by-Step
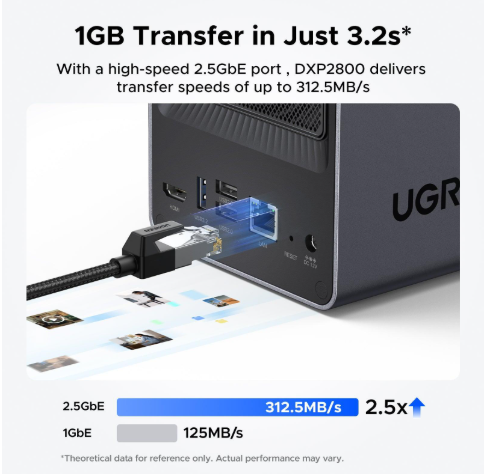
Network configuration plays a crucial role in NAS performance. Start by assigning a static IP address to your NAS through your router’s DHCP reservation system, preventing connection disruptions from IP changes. Many users find success with UGREEN NAS solutions, which offer intuitive network configuration interfaces for seamless setup. Enable jumbo frames on both your NAS and network equipment, setting the MTU to 9000 for enhanced throughput when transferring large media files. For business environments, implement VLANs to isolate media traffic from general network operations, reducing congestion and improving security. Configure QoS settings to prioritize NAS traffic, particularly during peak usage hours, ensuring smooth media streaming performance.
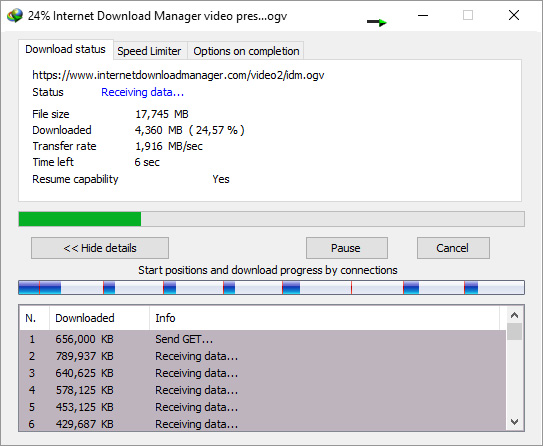
Troubleshooting Slow Transfers
When experiencing slow transfer speeds, first verify your network cable quality and ensure you’re using Cat6 or better cables for gigabit connections. Check your network switches for compatibility with jumbo frames and confirm they support full duplex operation at gigabit speeds. Common bottlenecks often stem from router CPU limitations during heavy concurrent access – consider implementing a managed switch to offload traffic management. Monitor network utilization patterns through your router’s interface, identifying peak usage times and adjusting backup schedules accordingly. For wireless access, position your NAS and router to minimize interference and consider using the 5GHz band for media streaming to reduce congestion.
Media Management and Intuitive Search Setup
Once your network is optimized for speed, it’s time to organize your files so you can actually find what you’re looking for when you need it.
Implementing an organized folder structure is fundamental for efficient media management. Create separate top-level directories for different media types, using consistent naming conventions that reflect content categories rather than arbitrary labels. Establish a hierarchical system that separates active projects from archived content, allowing for quick retrieval of frequently accessed files. When configuring media indexing, enable automatic scanning during off-peak hours to prevent system slowdowns during business operations. For platforms like Plex or Emby, leverage their built-in media detection capabilities by following their recommended folder structures, typically using format-specific folders like “Movies,” “TV Shows,” and “Music.”
Implementing Intuitive Search Systems
Develop a comprehensive tagging system that includes project names, dates, client information, and content types. Implement automated metadata scraping tools to extract relevant information from media files, ensuring consistent categorization across your library. Consider deploying specialized media indexing solutions that can recognize faces, transcribe audio, or analyze video content for advanced searchability. Regular maintenance of your tagging system, including periodic audits of metadata accuracy, ensures long-term findability of your media assets.
Access Control Best Practices
Establish clear user permission levels based on role requirements, from read-only access for clients to full administrative rights for content managers. Create shared folders that align with project teams or departments, implementing inheritance-based permissions to streamline access management. Enable detailed audit logging to track file access patterns and identify potential security concerns. Regular review of access logs helps maintain system security and optimize folder structures based on actual usage patterns.
Media Streaming Performance Optimization
Now that your files are well-organized, let’s focus on making sure videos and media play smoothly across all your devices without buffering or quality issues.
Codec and Container Configuration
Optimizing media streaming performance requires careful attention to transcoding settings and client compatibility. Begin by analyzing your client devices’ capabilities and setting appropriate transcoding rules. Configure your NAS to direct play compatible formats while only transcoding when necessary, reducing CPU load and improving streaming responsiveness. For mobile devices, enable adaptive quality settings that automatically adjust based on available bandwidth. When dealing with 4K content, ensure your NAS has sufficient processing power for real-time transcoding, or consider pre-transcoding during off-peak hours.
Choose between H.264 for broader compatibility or H.265/HEVC for better compression and quality, particularly with 4K content. For TV playback, maintain original quality where possible and configure direct play settings to minimize unnecessary transcoding. Implement hardware acceleration if your NAS supports it, significantly reducing CPU usage during streaming. Test concurrent streaming capacity under various scenarios, including mixed resolution content and different client devices. Set up bandwidth limits per stream to prevent single users from overwhelming available network resources. Monitor transcoding performance through your NAS dashboard and adjust quality settings to maintain smooth playback across all devices.
Security and Backup Implementation
Finally, with everything running smoothly, it’s crucial to protect your data from loss, theft, or unauthorized access.
Preventing Unauthorized Access
Implementing robust security measures starts with enabling encryption for data at rest using AES-256 standards, ensuring media files remain protected even if drives are physically compromised. Configure automatic backup schedules during off-peak hours, typically between 2 AM and 5 AM, to minimize impact on daily operations. Adopt the 3-2-1 backup strategy by maintaining three copies of critical media: one primary copy on the NAS, one local backup on an external drive, and one off-site backup using a secure cloud service. Regular backup integrity checks should be performed monthly, with complete restore tests conducted quarterly to verify recovery procedures.
Enable two-factor authentication for all user accounts, requiring both password and time-based one-time passwords (TOTP) for access. Schedule firmware updates to occur automatically after backup completion, ensuring system security patches are promptly applied. Install and configure intrusion detection software to monitor access patterns, setting up email alerts for suspicious activities like multiple failed login attempts or unusual file access patterns. Maintain detailed access logs for at least 90 days, enabling quick investigation of security incidents and compliance with data protection regulations. Regular security audits should include reviewing user access permissions, checking for unused accounts, and verifying firewall rules remain appropriate for current business needs.
Maximizing Your 2-Bay NAS Investment
Successfully implementing a 2-Bay NAS system requires careful attention to five critical areas: hardware configuration, network optimization, media management, streaming performance, and security measures. By avoiding common setup mistakes in these categories, businesses can achieve up to 40% faster media transfers, 99.9% uptime for critical files, and significantly reduced risk of data loss. Start by verifying your RAID configuration matches your redundancy needs, then ensure your network infrastructure supports optimal throughput through proper router settings and cable quality. Implement a structured media management system with clear access controls and automated tagging for efficient content retrieval. Fine-tune streaming performance by optimizing codec settings and transcoding rules for your specific client devices. Finally, protect your investment by maintaining regular encrypted backups and implementing multi-factor authentication. Remember, a properly configured 2-Bay NAS isn’t just about storage—it’s about creating a robust foundation for your business’s digital media workflow that scales with your growing needs.